How to Repair Rotting Fence Posts: Step-by-Step Guide

Updated: 4 days ago
Table of Contents
Last Updated: October 18, 2026
Assess the Damage: Is Your Fence Post Rotten or Just Loose?
When you need to repair rotting fence posts, know that a rotting fence post is not always a total loss. The first step is determining whether you're dealing with actual rot or simply a loose post that needs reinforcement. Understanding the difference saves time and money.
The Shake Test and Visual Inspection
Start with the shake test. Grab the fence post near the top and push it side to side. A loose post moves easily but feels solid.
Look for visible signs of decay:
Discolored or darkened wood
Soft spots that dent when pressed
Cracks running along the grain
Peeling or flaking bark
Fungal growth or mold
A simple test: press a screwdriver or awl into the wood. If it sinks in easily, rot has weakened the structure. If it meets resistance, the post is still sound.
Identifying Rot at the Ground Line
The most common problem spot is where the fence post meets the ground. Water pools there, wood stays wet, and decay spreads quickly.
Dig away soil around the base of the post to expose the wood. Look for:
Soft, crumbly wood texture
A clear line where solid wood becomes mushy
Wood that has turned gray or black
Sections that crumble when you touch them
If rot is limited to the bottom 12 to 18 inches, repair is often possible. If rot extends up the post beyond 2 feet, full replacement usually makes more sense.
How to Fix a Rotted Fence Post Without Replacing It
Not every rotted fence post needs to come out, and learning how to repair rotting fence posts can save you money. Sometimes you can save the post and avoid the cost and hassle of digging out concrete footings.
When Repair Makes Sense
Repair a rotted fence post when:
Damage is confined to the bottom 18 to 24 inches
The upper portion of the post is still solid and strong
The post is not leaning or unstable
The fence panels and rails are in good condition
You want to avoid the labor of full replacement
Repair does not work if:
Rot has spread more than halfway up the post
The post is leaning significantly
Multiple posts in a row are rotting
The concrete footing is crumbling
Repair Options by Damage Severity
Minor damage (surface cracks, small soft spots): Use a repair kit with wood filler and epoxy. These products seal out moisture and stabilize the wood. They work best on surface-level decay.
Severe damage (rot extending high up the post, deep soft spots): Full replacement is the safest choice. Attempting repairs on severely rotted posts can fail, leaving your fence unstable or even dangerous.
Step-by-Step: Repairing Rotted 4x4 Fence Posts
This is the most common fence post size and the process applies to most wood fence repairs. Follow these steps carefully to ensure a solid, long-lasting fix.

Step 1: Remove Fence Panels and Rails
Before you touch the post, remove the fence panels or rails attached to it.
Use a reciprocating saw or circular saw to cut through fasteners if needed. If rails are bolted, unbolt them. If they're nailed, pry them free carefully.
This step typically takes 30 to 60 minutes depending on how many connections there are.
Step 2: Dig Around the Damaged Post
Dig a hole around the base of the post, exposing the concrete footing and the lower section of wood.
Use a posthole digger, shovel, or mattock. Dig down to the concrete and out at least 12 inches on all sides of the post.
This step reveals the full extent of the damage and tells you whether repair or replacement is the right call.
Step 3: Remove Rotten Wood and Debris
Once you can see the rot clearly, remove all soft, decayed wood. Use a chisel, pry bar, or screwdriver to chip away the rotted sections.
Remove all debris, dirt, and loose wood chips from the hole.
Wear gloves and eye protection. Rotted wood splinters easily and can harbor mold spores.
Step 4: Deal With the Concrete Footing
You have two choices: remove the concrete or work around it.
Removing the concrete: If the concrete is crumbling or if you plan to replace the post, dig it out.
Keeping the concrete: If the footing is solid and you're repairing the post above ground, you can leave it.
Most repair projects keep the concrete footing in place. Removing it adds significant time and effort.
Step 5: Install Your Replacement Post
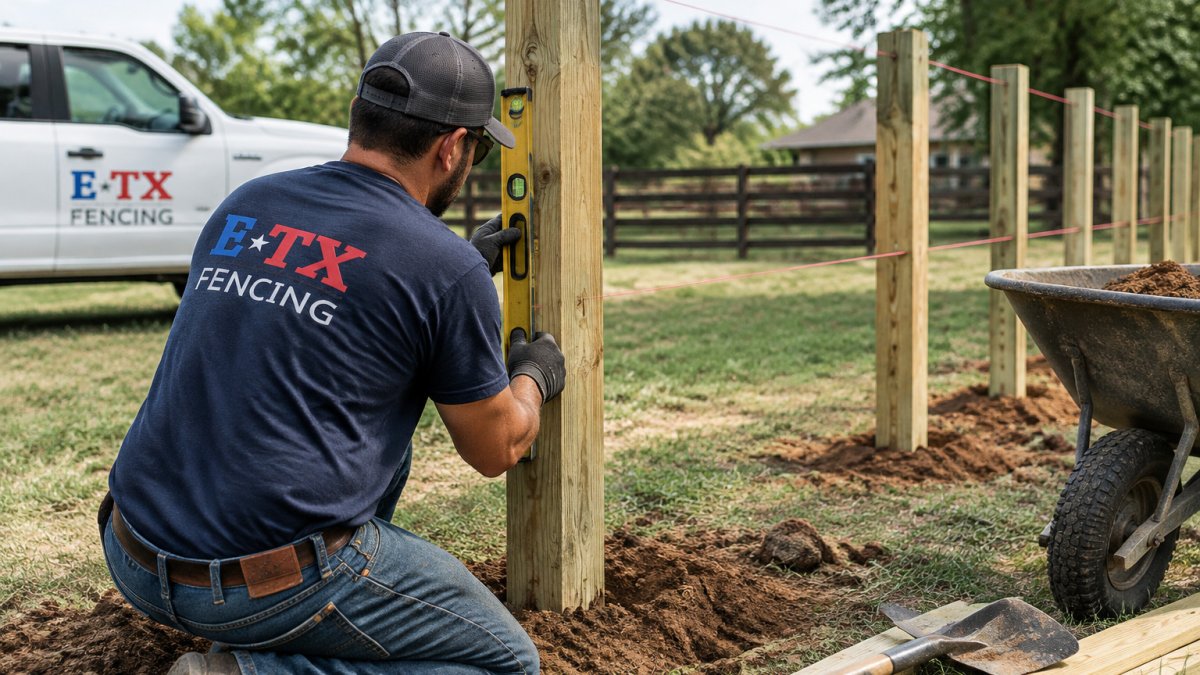
If you're replacing the entire post, install a new pressure-treated 4x4 in the hole. Position it plumb (perfectly vertical) using a level. Align it with the fence line.
If you're repairing the post and keeping the upper section, you may use a post repair sleeve or insert a new treated wood section at the base. Follow the kit instructions carefully for alignment and fastening.
Step 6: Set the Post in Concrete
Mix concrete according to package directions. Pour it into the hole around the post base. Use quick-setting concrete to speed up the process. Curing time is typically 24 to 48 hours, depending on the product.
Keep the post plumb while the concrete sets. Use temporary braces if needed. Do not reattach fence panels until the concrete has fully cured.
Using a Fence Post Repair Kit for Smaller Damage
Repair kits offer a faster alternative to full post replacement for minor to moderate rot. They work best on posts with damage limited to the lower section.
Handyman Startup
What's Inside a Repair Kit
A typical repair kit includes:
Wood filler or epoxy compound
A reinforcing sleeve or brace
Fasteners (bolts, screws, or nails)
Sandpaper or prep materials
Instructions
Some kits are designed to wrap around the post. Others fill cavities in the wood. The best kit for your job depends on the damage pattern and post size.
Application Process and Curing Time
Clean the damaged area with a wire brush or scraper. Remove loose wood and debris.
Apply the filler or epoxy according to kit instructions. Some products are applied like putty.
Cure time varies. Most products require 24 to 48 hours before the fence can bear weight again.
After curing, sand smooth and apply wood sealant to protect against future moisture.
Repair Versus Replacement: Know Your Costs and Timeline
The choice between repair and replacement depends on damage severity, post age, and your budget.
When Full Post Replacement Is Necessary
Replace the entire post if:
Rot extends more than 2 feet up the post
The post is visibly leaning or unstable
Multiple posts in the same section are failing
The concrete footing is crumbling
The post has been treated repeatedly but keeps rotting Choosing a more durable foundation prevents these recurring structural failures, making installing concrete posts a superior long-term solution for maintaining a sturdy perimeter.
Full replacement ensures long-term stability. A new treated post should last 15 to 20 years with proper maintenance.
Project Timeline and Curing Expectations
Repair project:
Diagnosis and removal: 1 to 2 hours
Applying repair kit or patch: 1 to 2 hours
Curing: 24 to 48 hours
Reattaching panels: 1 hour
Total time: 2 to 4 days (mostly waiting for cure time)
Full replacement project:
Removing panels and old post: 2 to 3 hours
Digging out concrete: 1 to 3 hours (depending on depth and size)
Installing new post and concrete: 1 to 2 hours
Curing: 24 to 48 hours
Reattaching panels: 1 to 2 hours
Total time: 3 to 7 days (mostly concrete cure time)
Planning ahead matters. If you need your fence functional quickly, a repair kit gets you back in business faster than a full replacement.
Safety Precautions and Tools You'll Need
Working with rotted wood and concrete requires proper safety gear and the right tools. Protect yourself and do the job right.
Safety gear:
Work gloves (leather or nitrile)
Eye protection (safety glasses or goggles)
Dust mask (rotted wood releases spores)
Steel-toed boots (concrete and tools are heavy)
Long sleeves (splinters and irritants)
Tools to have on hand:
Posthole digger or shovel
Pry bar or crowbar
Chisel or screwdriver (for removing rot)
Circular saw or reciprocating saw (for cutting fasteners)
Level (to ensure posts are plumb)
Tape measure
Hammer
Wrench or socket set (for bolts)
Wheelbarrow (for debris)
Mixing container (for concrete)
Rent a posthole digger or concrete mixer if you don't own one. The rental cost is small compared to the time saved.
Watch Out Never work alone on a fence post repair. Have someone present in case of injury. Falling posts and concrete can cause serious harm.
Prevent Future Rot: Wood Treatment and Drainage Solutions
The best repair is prevention. Stop rot before it starts by treating wood and managing water around fence posts.
Applying Wood Preservative and Sealant
Treat new posts or repaired posts with wood preservative before installation. This slows decay significantly. Pressure-treated posts come pre-treated, but adding sealant extends their life.
Apply wood sealant every 2 to 3 years. This keeps moisture out and prevents new rot from forming.
Quality sealants add years to fence life. The small cost of sealant is worth the protection.
Improving Drainage Around Your Posts
Water pooling around fence posts accelerates rot. Improve drainage by:
Sloping soil away from the post base
Adding gravel or mulch around the post (keeps soil from compacting)
Installing a drain tile if the area stays wet
Trimming vegetation that traps moisture
Ensure gutters and downspouts don't direct water toward fence lines. Even small changes in grading or drainage make a big difference over time.
Key Takeaway The majority of fence rot happens because water sits at ground level. Fix drainage first, and you'll prevent most rot problems before they start.
Common Mistakes to Avoid
Learning from others' errors saves time and frustration.
Ignoring early signs of rot. Small soft spots turn into big problems fast.
Skipping the concrete footing. Posts set in soil alone fail quickly.
Reattaching panels before concrete cures. Patience matters.
Using untreated wood for repairs. Always use pressure-treated lumber for fence posts and repairs.
Attempting repairs on severely rotted posts. Some posts are too far gone.
If you're unsure whether to repair or replace, or if the damage looks beyond your comfort level, professional help is worth the investment.
Frequently Asked Questions
How can I tell if my fence post is rotten or just loose?
Perform a shake test by pushing on the post near the top with firm pressure. A loose post will move but the wood feels solid. A rotten post may not move much, but the wood feels soft, spongy, or crumbles when you press it. Look for discoloration, cracks, or visible decay at the ground line where moisture accumulates. If the wood is mushy or darkened several inches above ground, rot has likely set in.
Can I fix a rotted 4x4 fence post without replacing it?
Yes, if the rot is limited to the top or outer edges of the post. Small damaged areas can be cut out and filled with epoxy filler or wood putty, then sealed with a rot inhibitor and wood preservative. However, if rot extends below ground or compromises more than 25% of the post's cross-section, full replacement is safer and more cost-effective. Structural integrity depends on solid wood supporting the fence panels and rails.
How much does it cost to replace a rotted fence post?
Replacement costs depend on post material, size, concrete removal, and labor. Pricing varies based on how many posts need work, whether you remove the concrete footing yourself, and local material availability. Contact ETX Fencing for a free estimate tailored to your specific project and damage extent.
How long does a repaired fence post stay stable?
A properly repaired post with quality epoxy filler and wood preservative can last 5-10 years or longer, depending on local moisture and weather. Full replacement posts set in fresh concrete typically last 15-20 years with wood treatment and good drainage. Prevention through sealant reapplication every 2-3 years significantly extends post life and reduces future rot risk.